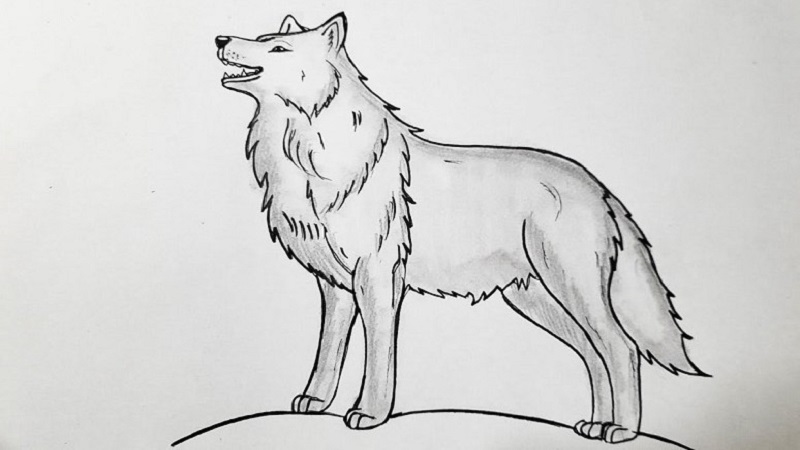
Wolves are fascinating creatures. Known for their grace, strength, and mystery, they have long captured the imaginations of artists and nature enthusiasts alike. Despite their complexity, easy:qm60 sirsa= wolf drawing doesn’t have to be overwhelming. This guide aims to simplify the process into an easy wolf drawing that’s accessible for everyone. By following these steps and focusing on the basic elements of wolf anatomy and structure, you’ll be able to create a drawing you’re proud of.
Materials Needed for Easy Wolf Drawing
To start your wolf drawing journey, it’s important to gather the right materials. While you don’t need expensive art supplies, having quality materials will make the process smoother and more enjoyable.
- Pencils: You’ll want a variety of pencils for different stages of your drawing. For sketching the outline, an HB or 2B pencil works well. For shading and adding depth, softer pencils like 4B and 6B can give you a richer, darker tone.
- Erasers: A kneaded eraser is ideal for lightening specific areas without erasing everything. A traditional rubber eraser works well for larger mistakes.
- Sharpener: Keep your pencils sharp for detailed work, especially when drawing fur and facial features.
- Drawing Paper: Smooth, thick paper is best for easy wolf drawing, as it allows for better shading and doesn’t wear down easily with repeated erasing.
- Optional Tools:
- Blending stumps or tissue for blending shades smoothly.
- Colored pencils or watercolors if you wish to add a bit of color to your drawing.
Understanding Wolf Anatomy
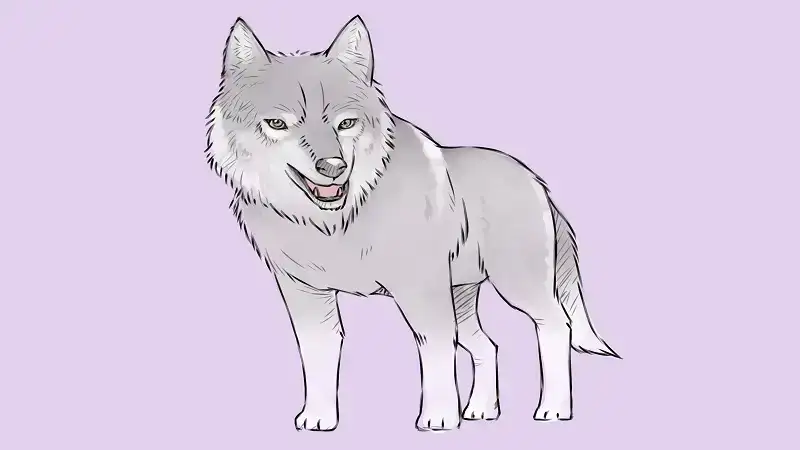
Before we start drawing, it’s essential to understand the anatomy of a wolf. A wolf body is built for speed and endurance, with long, slender legs and a streamlined body. Their faces are also quite distinctive, with strong jaws, piercing eyes, and upright ears.
- Head: The wolf’s head is broad with a pronounced snout and a defined jawline. Understanding the relationship between these features will help you capture the wolf’s essence.
- Body: A wolf’s body is sleek and muscular. Unlike domestic dogs, wolves have a more narrow and elongated structure. Their bodies are designed for running and hunting in packs.
- Proportions: A wolf’s head should be slightly smaller compared to its body, with long legs making up most of the figure. This proportion is important for an easy wolf drawing that looks balanced and realistic.
Sketching Basic Shapes
To begin, sketch out the basic shapes. Start with simple, light strokes to establish the proportions and structure of the wolf.
- Head: Draw a circle for the head, and add a guideline down the center to help with symmetry.
- Body: Draw an oval for the torso, making sure it’s proportionally longer than the head.
- Legs: Use straight lines or thin rectangles to map out the legs. For now, focus on placing them in the correct position rather than worrying about details.
Drawing the Wolf’s Head
Next, we’ll refine the head by adding more detail.
- Snout and Jawline: Start by extending the circle to form the wolf’s snout. The snout should be long and taper slightly towards the end. Add a soft, curved line to define the jawline.
- Ears: Draw two triangular shapes on top of the head. Wolves have large, pointed ears that stand tall, which is key to capturing their alert expression.
Refining the Face – Eyes, Nose, and Mouth
Wolves are known for their expressive eyes and sharp facial features. This step is where your easy wolf easy:qm60 sirsa= wolf drawing starts to take shape.
- Eyes: Place the eyes along the center guideline. Wolves’ eyes are almond-shaped, and they should have a slight upward tilt to create that intense, focused gaze. Add shading around the eyes to give them depth.
- Nose: Draw an oval or triangle at the tip of the snout for the nose. Add subtle shading to give it dimension and include the nostrils.
- Mouth: Wolves have strong, defined mouths. Draw a subtle curve underneath the nose to form the upper lip and jaw. You can add slight details to indicate where the mouth opens.
Shaping the Body and Legs
Now that the head is in place, we’ll move on to shaping the body.
- Torso: Using the oval as a guide, start shaping the wolf’s torso. Wolves have a lean, streamlined body, so keep the lines smooth and continuous.
- Legs: Add muscle definition to the legs by refining the lines. The front legs should appear straight and strong, while the back legs have a bend at the knee, showing the wolf’s agile stance.
Drawing the Tail
The tail is a key part of the wolf’s body language, and it should appear thick and bushy.
- Flow and Movement: Draw the tail curving slightly upwards or downwards depending on the posture you want to depict. Use long, flowing lines to create a sense of movement.
- Texture: Add fur strokes to the tail, making it appear bushy and natural.
Adding Fur to the Drawing
Fur is one of the most important aspects of easy:qm60 sirsa= wolf drawing, as it adds texture and realism.
- Short, Quick Strokes: Use short, light strokes to create the appearance of fur. Around the neck and chest, the fur is thicker, so you can use slightly longer strokes to emphasize this area.
- Layering: Wolves have layers of fur, so make sure to overlap your strokes slightly to create depth. Don’t make the fur too uniform; adding variation in length and direction will make it look more natural.
Shading for Depth and Dimension
Shading brings your drawing to life by adding depth and dimension.
- Light Source: Decide where your light source is coming from and start shading accordingly. The areas furthest from the light source should be the darkest.
- Highlights: Use an eraser or light pencil strokes to add highlights to the wolf’s fur, especially along the top of the snout, ears, and forehead. This creates the illusion of light hitting these areas.
Finishing Touches and Detailing
Now that the major elements of your easy wolf drawing are in place, it’s time to refine the smaller details.
- Claws and Paws: Add claws to the paws, making sure they look sharp and pointed.
- Whiskers: Lightly sketch in the whiskers around the nose and mouth area.
- Final Adjustments: Step back from your drawing and look for any areas that might need refining. Erase unnecessary guidelines and darken the final lines.
Common Mistakes in Wolf Drawing
As you practice easy:qm60 sirsa= wolf drawing wolves, it’s easy to make mistakes. Here are a few common issues and how to avoid them:
- Proportional Issues: If the wolf head looks too large or small compared to the body, double-check your initial guidelines. Adjust as needed before moving forward with details.
- Symmetry Problems: Wolves have symmetrical faces. Use a centerline to help keep both sides of the face even.
- Fur Texture Mistakes: Make sure your fur strokes follow the natural direction of the wolf’s fur. Avoid making the fur look too stiff or uniform.
How to Add More Realism to Your Easy Wolf Drawing
If you want to take your easy wolf drawing to the next level, consider adding more realism with these tips:
- Reference Photos: Use high-quality photos of wolves to study their fur patterns, posture, and features.
- Advanced Fur Techniques: Try using different pencil pressures to vary the texture of the fur. Press harder in areas where the fur is thicker, and use light strokes for softer fur.
Easy Wolf Drawing for Children
Teaching kids how to draw wolves can be simplified by focusing on basic shapes.
- Basic Shapes for Kids: Guide children to start with circles, ovals, and triangles. These shapes make the drawing process easier and more fun.
- Creative Coloring: Encourage them to add their own colors and patterns to the wolf, fostering creativity.
Tips for Continuous Improvement
Even if you master your first easy wolf drawing, there’s always room for improvement.
- Practice Regularly: The more you draw, the better you’ll get. Try drawing wolves in different poses or angles to challenge yourself.
- Experiment with Styles: Don’t be afraid to experiment with different styles, from realistic to more cartoon-like wolves.
Conclusion
Creating an easy wolf drawing is both fun and educational. By breaking the process down into simple steps, you can create a beautiful wolf drawing that captures the essence of this majestic animal. With practice and patience, your wolf drawing skills will only improve, and soon you’ll be able to draw wolves with confidence and precision.
FAQs
1.Is drawing a wolf difficult for beginners?
Not at all! With the right guidance, such as this step-by-step tutorial, anyone can create a beautiful wolf drawing.
2.What tools do I need to draw a wolf?
All you need are pencils, erasers, paper, and a bit of patience. Optional tools include blending stumps for shading.
3.How can I improve my wolf drawing?
Regular practice, studying wolf anatomy, and using reference photos can significantly improve your wolf drawing skills.
4.Can children learn how to draw wolves?
Yes! By simplifying the steps and focusing on basic shapes, kids can easily learn how to draw a wolf.
5.What the best way to add realism to my wolf drawing?
Adding fur texture, realistic shading, and using reference images can bring more realism to your drawing.