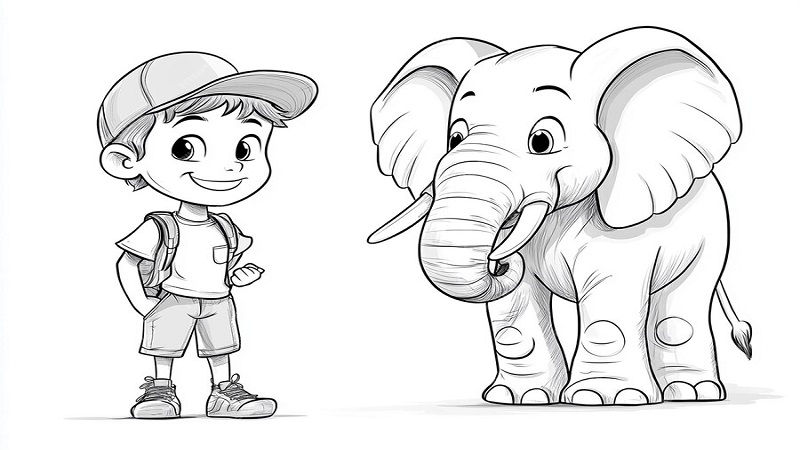
Drawing animals is a fantastic way to improve your artistic skills. Whether you are a beginner or a seasoned artist, drawing an elephant can be a rewarding challenge. Elephants, with their massive size and unique features, present a wonderful opportunity to explore form, texture, and shading. In this article, we’ll delve into a detailed guide on creating an elephant drawing, focusing on the topic drawing:k4ihdmzbtqg= elephant and providing you with the necessary tips and techniques to bring your elephant sketch to life.
Understanding Elephant Anatomy
Before diving into the drawing process, it’s crucial to understand the basic anatomy of an elephant. These magnificent creatures are characterized by their large bodies, long trunks, and oversized ears. Knowing the proportions and structure of an elephant will help you create a more realistic drawing.
The Elephant’s Head and Trunk
The head of an elephant is quite large, and the trunk is one of the most distinctive features. The trunk is flexible and muscular, used for various functions such as breathing, drinking, and grabbing objects.
Elephant Ears
Elephants have large, fan-like ears that are different in shape depending on the species. African elephants have larger, more rounded ears, while Asian elephants have smaller, more triangular ears.
Elephant Body Structure
The body of an elephant is massive and bulky. The legs are thick and sturdy, supporting the elephant’s enormous weight. The tail is relatively small compared to the rest of the body.
Materials You’ll Need
To start your drawing, gather the necessary materials. This includes pencils (HB for outlines, 2B and 4B for shading), an eraser, a sharpener, and drawing paper. Having these tools at hand will make the drawing process smoother.
Start with Basic Shapes
Drawing the Head
Begin your drawing:k4ihdmzbtqg= elephant by sketching a large oval for the head. This will be the base for the elephant’s face and trunk. Keep your lines light at this stage.
Adding the Body
Next, draw a large, rounded rectangle or oval shape connected to the head. This shape will represent the elephant’s body. Again, use light lines as you’ll be refining these shapes later.
Drawing the Legs
For the legs, draw four thick, vertical rectangles extending from the body. Elephants have sturdy legs, so make sure the proportions reflect their strength. The front legs might be slightly larger than the back legs.
Sketching the Trunk and Ears
Draw the trunk extending from the bottom of the oval (head) you initially sketched. The trunk should curve naturally, resembling the flexibility it has in real life. For the ears, draw two large, fan-shaped forms on either side of the head. These will be more rounded if you’re drawing an African elephant and more triangular if it’s an Asian elephant.
Refining the Outline
Now that the basic shapes are in place, it’s time to refine your sketch.
Defining the Head and Trunk
Carefully outline the elephant’s head, adding details like the wrinkles on the trunk and around the eyes. The trunk should gradually taper as it extends downwards. Add a small, rounded tip to the end of the trunk to complete it.
Shaping the Ears
Refine the shapes of the ears, adding the folds and texture that make elephant ears so distinctive. Remember, the ears should connect smoothly to the head and reflect the natural curves.
Outlining the Body and Legs
Trace over the body shape, making the outline smoother and more defined. Add the curves and contours that represent the elephant’s bulk. For the legs, add slight curves at the joints and refine the feet, making them more rounded.
Adding Details
Details are what bring your drawing:k4ihdmzbtqg= elephant to life.
Drawing the Eyes and Tusks
Elephants have relatively small eyes compared to their heads. Draw the eyes slightly above the trunk. For tusks, if you’re drawing a male elephant, sketch two long, curved lines extending from the sides of the trunk. Female elephants may have smaller or no visible tusks depending on the species.
Texturing the Skin
Elephant skin is thick and wrinkled. Use short, curved lines to represent the texture on the trunk, ears, and body. The skin near the joints and around the face should be especially wrinkled. These details add realism to your drawing.
Adding the Tail
Draw the tail extending from the back of the elephant’s body. The tail is relatively thin and ends in a small tuft of hair.
Shading Your Elephant Drawing
Shading is crucial in making your drawing:k4ihdmzbtqg= elephant appear three-dimensional and lifelike.
Light Source and Shadows
First, decide where the light is coming from. This will determine where to add shadows. Typically, shadows will be under the trunk, beneath the belly, and on the side of the legs opposite the light source.
Shading the Trunk and Body
Using a 2B or 4B pencil, add shading to the trunk, following the natural curves and wrinkles. Shade the body, adding darker tones where shadows would naturally fall. Gradually blend the shading to create smooth transitions between light and dark areas.
Highlighting the Ears and Legs
Shade the ears with attention to the folds and inner curves. The legs should have shadows on the inner sides, especially where they connect to the body.
Adding Final Touches
Before finishing, review your drawing:k4ihdmzbtqg= elephant for any areas that need refinement.
Enhancing the Details
Go over the details like the eyes, tusks, and wrinkles to make them stand out. Add any last touches to the shading to ensure the drawing has depth and dimension.
Cleaning Up the Drawing
Erase any unnecessary lines that were part of the initial sketch. Clean up the edges and make sure the final outline is clear and defined.
Tips for Improving Your Elephant Drawing
Practice Different Poses
To get better at drawing elephants, practice different poses. Try sketching elephants from the side, front, or at an angle. This will improve your understanding of their anatomy and how to capture their form in different perspectives.
Study Elephant Photos and Videos
Looking at photos and videos of elephants can give you a better sense of how they move and how their bodies look in different positions. This reference material is invaluable when aiming for a realistic drawing.
Experiment with Different Styles
Don’t be afraid to experiment with different styles. You can try a more realistic approach with detailed shading, or go for a more cartoonish or stylized elephant. Each style will teach you something new about drawing elephant.
Common Mistakes to Avoid
Incorrect Proportions
One of the most common mistakes is getting the proportions wrong. Elephants have very distinctive body shapes, so make sure the head, body, and legs are in the correct ratio.
Overcomplicating the Details
While details are important, overcomplicating them can make your drawing look messy. Focus on the most important details and keep your lines clean and deliberate.
Ignoring the Texture
Elephant skin is unique, and ignoring this texture can make your drawing look flat. Remember to add wrinkles and shading to represent the thick, textured skin.
Displaying Your Artwork
Once you’re satisfied with your drawing, consider displaying it. You can frame your drawing:k4ihdmzbtqg= elephant or share it on social media to get feedback and connect with other artists.
Conclusion
Drawing an elephant can be a challenging but rewarding experience. By following this guide on drawing elephant, you’ll be able to create a detailed and realistic elephant sketch. Remember to take your time, practice regularly, and most importantly, enjoy the process.
FAQs
1. What materials are best for drawing an elephant?
You’ll need pencils (HB for outlines, 2B and 4B for shading), an eraser, a sharpener, and quality drawing paper.
2. How can I improve my elephant drawing?
Practice different poses, study reference photos, and experiment with different drawing styles to improve your skills.
3. What’s the most challenging part of drawing an elephant?
Getting the proportions right and capturing the texture of the elephant’s skin are often the most challenging aspects.
4. How do I add realistic shading to my elephant drawing?
Decide on a light source and add shading to areas that would naturally be in shadow, such as under the trunk and belly.
5. Can I draw an elephant in a cartoon style?
Absolutely! Experimenting with different styles, including cartoonish renditions, can be a fun way to enhance your creativity.